How to Replace Toshiba Satellite A10 / Tecra A1 LCD Inverter
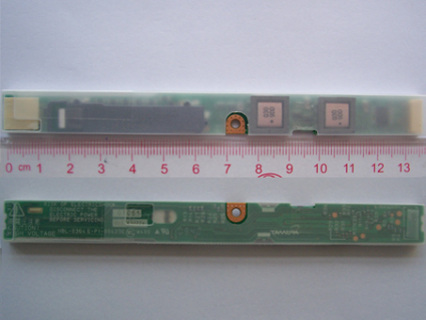
Original TOSHIBA Satellite A10 Tecra A1 LCD Inverter

$
16.99
Unit: PCS
Type: Laptop LCD Inverter
Condition: Brand New
Warranty: 3 Months
Remark: Please ensure the connector of your original inverter is 9-pin connector, not 7-pin one, if yours is 7-pin, please contact us.
Availability: in stock
Payment | Delivery: PayPal | HongKong Registered Air Mail With Tracking Number
Free Shipping to worldwide range!
Compatible Inverter Part#
E-P1-50423E HBL-0364
Compatible Laptop Model#
Toshiba:
Satellite A10 Series Satellite A10-S127 Satellite A15 Series Satellite A40-S270 Satellite M1 Series Satellite M2 Series Satellite M2V Series Tecra A1 Series Tecra A2 Series Tecra A8 Series Tecra M5 PTM51L-0JG010 Tecra M5 Series
More information, please refer to our website www.battery-adpater.com.
Satellite A10 Series Satellite A10-S127 Satellite A15 Series Satellite A40-S270 Satellite M1 Series Satellite M2 Series Satellite M2V Series Tecra A1 Series Tecra A2 Series Tecra A8 Series Tecra M5 PTM51L-0JG010 Tecra M5 Series
More information, please refer to our website www.battery-adpater.com.
How to Replace Toshiba Satellite A10 / Tecra A1 LCD Inverter
|
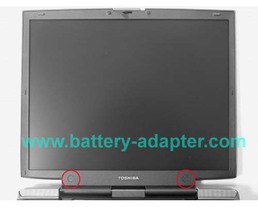
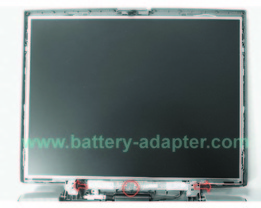
How to replace Toshiba Satellte A10 / Tecra A1 LCD inverter In this guide, the actual laptop is Toshiba Tecra A1. It should also work on Toshiba Satellite A10. 1. Turn off your laptop. Please unplug the power adapter and remove the battery. 2. Using a sharp object, for example a small flat-head screwdriver, remove two mask seals at the bottom corners of the display assembly. Then remove two M2.5x6 black flat head screws securing the display mask. 3. There are 24 latches securing the display bezel. Carefully insert your fingers between the bezel and the LCD panel and pry open the latches starting from the bottom six latches, to the five latches on the right and left sides, ending with the six top latches. Remove the display bezel. 4. Remove one M2x4 brass flat head screw securing the Toshiba Satellte A10 / Tecra A1 inverter board. Carefully lift up the inverter board and disconnect the cabes on the two ends of the inverter. Reverse the procdure to install your new Toshiba Satellite A10 / Tecra A1 LCD inverter and assmeble your computer. If you want to replace Toshiba Satellite A10 / Tecra A1 keyboard and fan, you can refer to these posts: How to Replace Toshiba Satellite A10 / Tecra A1 keyboard How to Replace Toshiba Satellite A10 / Tecra A1 fan |

