How to Replace / Remove Dell Inspiron 14R N4010 LCD Cable
Original New LCD Cable for DELL Inspiron 14R N4010 Series Laptop

$
16.99
Specification: For use with 14" LCD Display Screen
Unit: 1 PCE
Type: Laptop LCD Video Cable
Condition: Brand New
Warranty: 3 Months
Remark: This is a 100% original & brand new LCD video cable for Dell Inspiron 14R (N4010) Series Laptop. The picture is the actual item!
Availability: in stock
Payment | Delivery: PayPal | HongKong Registered Air Mail With Tracking Number
Free Shipping to Worldwide Range!
Compatible Hinges Part#:
02HW70 DD0UM8LC000 DD0UM8TH000 DD0UM8TH001
Compatible Laptop model#:
Related Product:
Dell Inspiron 14R N4010 AC adapter
Dell Inspiron 14R N4010 Keyboard
Dell Inspiron 14R N4010 LCD Hinges
Dell Inspiron 14R N4010 LCD Cable
Dell Inspiron 14R N4010 CPU Fan
Dell Inspiron 14R N4010 Keyboard
Dell Inspiron 14R N4010 LCD Hinges
Dell Inspiron 14R N4010 LCD Cable
Dell Inspiron 14R N4010 CPU Fan
How to Replace Dell Inspiron 14R N4010 LCD Cable
Firstly, you need to remove the display assembly out of the computer base.
- Unplug the AC adapter and remove the battery.
- Remove the Optical Drive.
- Remove the module cover and memory module(s).
- Remove the Dell Inspiron 14R N4010 keyboard.
- Remove the palm rest.
- Disconnect the antenna cables from the Mini-Card(s) (see Removing the Mini-Card(s)).
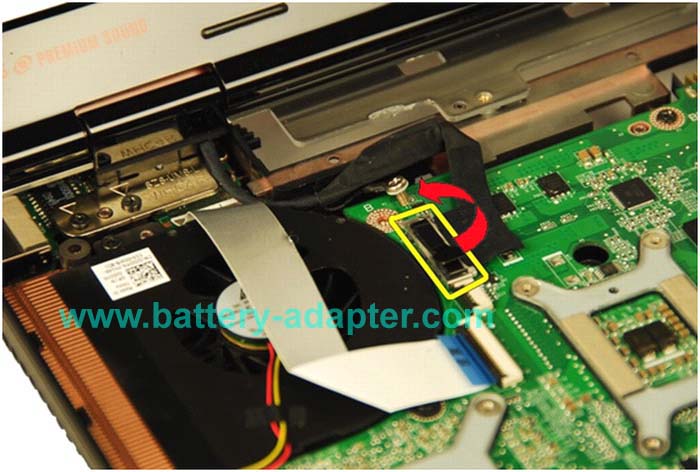
Remove Dell Inspiron 14 N4010 Cable -1

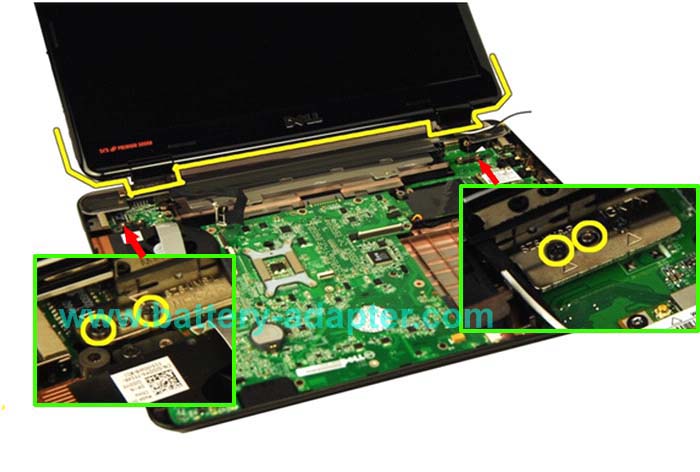
Remove Dell Inspiron 14 N4010 Cable -3
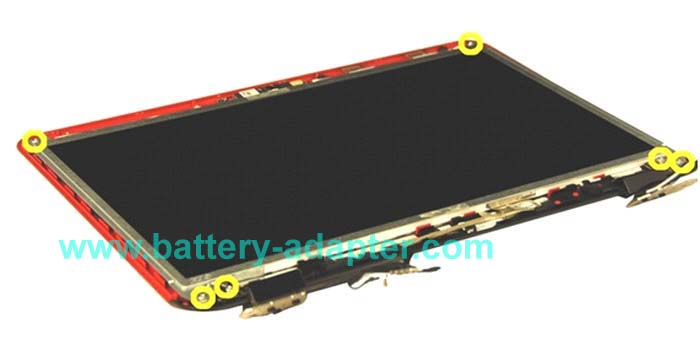
Remove Dell Inspiron 14 N4010 Cable -5
|
1. Disconnect the Dell Inspiron 14R N4010 LCD cable from the connector on the system board, and remove the LCD cable grounding screw.
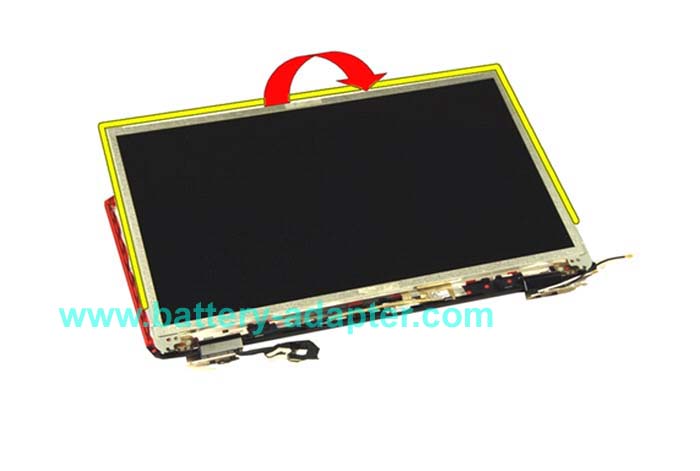
Make a note of the Mini-Card antenna cables and LCD cable routing and remove the cables from the routing guides. 2. Hold the display assembly in place and remove the four screws that secure the display assembly to the computer base. Lift and remove the LCD assembly out of the computer base. 3. Using your fingertips, carefully pry up the inside edge of the display bezel. Remove the display bezel. 4. Remove the six screws that secure the display panel to the display cover. Make a note of the display cable routing on the display cover. . 5. Turn the display panel over and place it on a clean surface. 6. Lift the tape that secures the Dell Inspiron 14R N4010 LCD cable to the display board connector and disconnect the LCD cable. Reverse the procedure to install the new Dell Inspiron 14R N4010 LCD cable. |
Remove Dell Inspiron 14 N4010 Cable -2
Remove Dell Inspiron 14 N4010 Cable -4
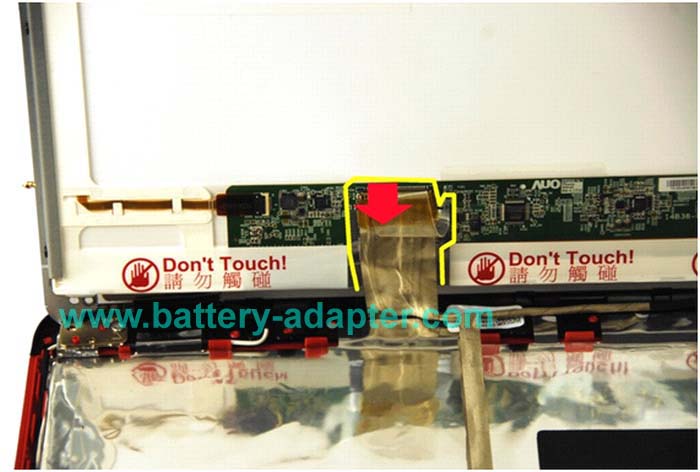
Remove Dell Inspiron 14 N4010 Cable -6
|