How to Replace the HP G61 / Compaq Presario CQ61 LCD Hinges
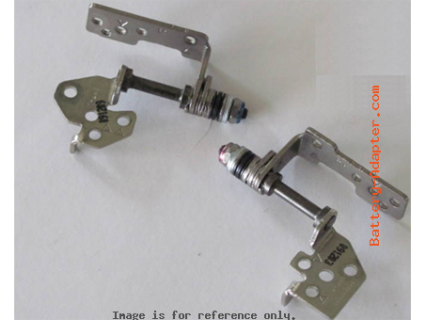
Original Brand New Screen Hinges For HP G61 / COMPAQ Presario CQ61 Series
$
15.62
Specification: Left & Right Hinge Set For 15.6" and 16" LCD Panel
Unit: Pair (left one and right one)
Type: Laptop LCD Hinges
Condition: Brand New
Warranty: 3 Months
Availability: in stock
Payment | Delivery: PayPal | HongKong Registered Air Mail With Tracking Number
Free Shipping to Worldwide Range!
Unit: Pair (left one and right one)
Type: Laptop LCD Hinges
Condition: Brand New
Warranty: 3 Months
Availability: in stock
Payment | Delivery: PayPal | HongKong Registered Air Mail With Tracking Number
Free Shipping to Worldwide Range!
Compatible Hinges Part#
530993-001 FB0P6008010 FB0P6010010 OP6-L OP6-R SPS: 535602-001
Compatible Laptop Model#
HP: G61 Series G61-100 Series G61-200 Series G61-300 Series
Compaq: Presario CQ61 Series Presario CQ61-100 Series Presario CQ61-200 Series Presario CQ61-300 Series
More information, please refer to our website www.battery-adpater.com.
Compaq: Presario CQ61 Series Presario CQ61-100 Series Presario CQ61-200 Series Presario CQ61-300 Series
More information, please refer to our website www.battery-adpater.com.
How to Replace HP G61 / Compaq Presario CQ61 LCD Hinges
|
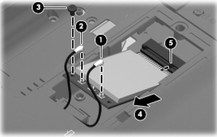
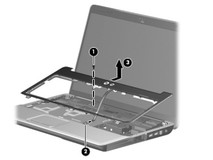
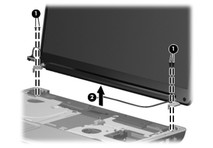
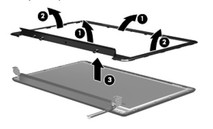
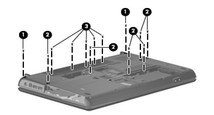
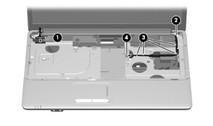
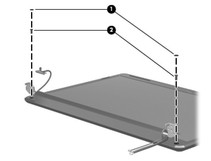
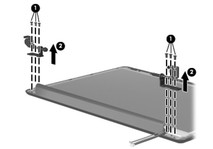
First of all, please turn off your HP G61 / Compaq CQ61. Disconnect the AC adapter and remove the battery. Then remove the keyboard, you can refer to my another instruction How to Replace HP G61 / Compaq Presario CQ61 keyboard . 1. Disconnect the 2 WLAN antenna cables from the WLAN module after you remove the wireless module compartment cover. And release the cables through the opening in the top cover. The black WLAN antenna cable 1 is connected to the WLAN module “Main” terminal. The gray WLAN antenna cable 2 is connected to the WLAN module “Aux” terminal. 2. Remove the HP G61 / Compaq Presario CQ61 keyboard cover Remove the six Phillips PM2.5×6.5 screws 1 and the five Phillips PM2.0×3.0 screws 2 that secure the keyboard cover to the base enclosure. The keyboard cover screws are identified by a triangle icon embossed on the base enclosure. 3. Open the computer as far as possible.Remove the remaining Phillips PM2.5×6.5 screw 1 that secures the keyboard cover to the base enclosure. Disconnect the LED board cable 2, which is attached to the underside of the keyboard cover, from the system board. Remove the keyboard cover 3. 4. Disconnect the display panel/webcam cable 1 from the system board and remove the cable from the cavity between the system board and the left display hinge. Disconnect the microphone cable 2 from the system board and remove the cable from the clips and routing channels 3 built into the top cover. Remove the WLAN antenna cables 4 from the clips and routing channels built into the top cover. 5. Remove the four Phillips PM2.5×6.5 screws 1 that secure the display assembly to the base enclosure. Lift the display assembly 2 straight up. 6.Remove the two round Mylar screw covers 1 on the display bezel bottom edge. The screw covers are included in the Display Rubber Kit, spare part number 530999-001. Remove the two Phillips PM2.5×6.5 screws 2 that secure the bezel to the display assembly. 7.Flex the inside of the top and bottom edges 1 and the left and right sides 2 of the display bezel until it disengages from the display enclosure.Remove the display bezel 3. 8. Remove the two Phillips PM2.5×5.0 screws 1 that secure each hinge to the display panel. Remove the display hinges 2. The HP G61 / Compaq Presario CQ61 Display Hinge Kit is available using spare part number 530993-001. Now, you can install you new HP G61 / Compaq Presario CQ61 Hinges . Reverse the procedure to assemble your laptop. |
